Hello, hello! I have stopped briefly to show you the laundry room, I'm really excited about the progress. This has really been a fun project so far and I'm closing in on the finished project. Are you ready for a dose of reality? Here is the what's what of the laundry room. I am ashamed, head bowed and shaking, but you can see the need for tackling this project. The builder slapped a wire shelf up and called it a day. My poor attempt to organize with canvas totes, and the dryer a catch all for laundry room clutter. I probably don't need to point out the incredible waste of space above the shelf....

So first things first, I cleared the entire room of everything, including the appliances.

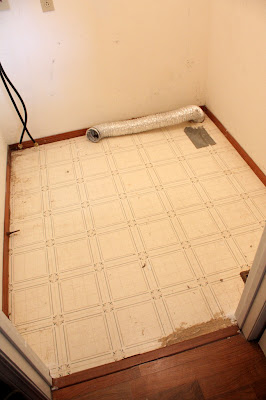
The flooring in desperate need of updating. It's also damaged in a couple of areas too so we decided to replace it.

It was SO easy to rip it up, it was kinda fun too, I carefully took off the baseboards and ripped the linoleum up. It gave little resistance and so satisfying to give it the heave-ho. Keegan took my 'action' shot for me. :)

I did have to scrape up some adhesive spots, but it wasn't too bad. The sub floor is ready for it's next life!

I've opened up a can of worms with what I did to the ceiling. We have the dreaded popcorn ceiling throughout the house...and I decided to remove it in the laundry room, just to see how bad it would be. The best method that I have for removing popcorn is a spray bottle of water and a plastic putty knife/paint scraper (plastic is best to minimize gouging). I worked a section at a time, dampening with water and scraping off the popcorn. Make sure to have something to collect the 'popcorn goop', I used a cardboard box and used the edge of it to clean the knife off too. It was practically dust free, still messy, but I didn't worry about a film of chalky dust getting everywhere.
It went pretty quick, and aside from aching arms, I'm glad I tried it.

To reward myself for all that hard work, I added more work. ;) I was thrilled with how smooth the ceiling was, I decided to feature it!! Highlight it with some stripes! I chose to use the same wall color in the kitchen (Bedford Grey from Martha) to paint the stripes and really tie the areas together, the white is the kitchen wall cabinet color (Taylor's Chalk from Martha) This room will be nothing if not fun!


0 comments:
Post a Comment